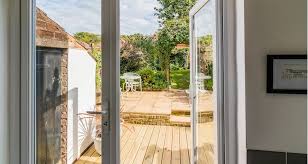
Thinking about transforming your outdoor space? Installing external bifold doors is one of the best ways to bring more light into your home and create a smooth flow between inside and outside. These folding doors are modern, stylish, and a smart upgrade that makes your space feel bigger and brighter.
If you’re ready to enjoy wide-open views, more fresh air, and a cleaner look, this guide will walk you through how external bifold door installation works—and what to expect at every stage.
What Are External Bifold Doors?
External bifold doors are made of multiple glass panels that fold and slide along a track. Unlike sliding doors, which only open halfway, bifold doors can open up almost the entire wall. That means more light, more space, and better access to your patio, garden, or backyard.
They’re perfect for homeowners who want an open feel and better outdoor living.
Should You Install Them Yourself?
Installing external bifold doors can be a big job. It’s not just about placing panels—it’s about getting the measurements, alignment, and sealing just right. While experienced DIYers might try it, most homeowners prefer hiring a professional. This ensures the doors function properly and protect your home from the weather.
Still curious about the process? Let’s walk through the steps.
Step 1: Measure the Opening
Before you can install anything, the first step is to measure the opening where the doors will go. This includes checking the width, height, and level of the opening. Accuracy here is key—small mistakes can cause major problems later.
If you’re replacing old patio doors, a pro may need to widen or adjust the frame to fit the bifold system properly.
Step 2: Choose Your Door Configuration
You’ll need to decide how many panels your bifold door should have, which direction they’ll fold, and whether they open from the left, right, or center. This depends on the size of the opening and how you want the doors to function.
Popular configurations include two-panel, four-panel, and six-panel options. Some fold all to one side, while others split in the middle.
Step 3: Prepare the Opening
Once your doors are ready and measured, the next step is to prepare the opening. This involves removing the old doors (if replacing), clearing out any debris, and making sure the opening is square, clean, and dry.
At this stage, the installer will double-check the space and make sure the wall structure can support the bifold system. If needed, extra framing or reinforcements will be added.
Step 4: Install the Frame and Track
The frame and track form the base of the bifold door system. These parts must be level and firmly secured because they support the panels and guide them as they fold and slide.
Installers use strong brackets and fixings to attach the frame to the wall. Once in place, they test the frame to make sure everything lines up perfectly before moving forward.
Step 5: Fit the Door Panels
Now comes the fun part—fitting the panels. Each glass panel is carefully lifted and placed into the frame. The installer connects the hinges, rollers, and hardware that let the doors move smoothly.
Each panel must be aligned just right to fold properly. This step takes a bit of adjusting, but it’s key to making sure the doors open and close with ease.
Step 6: Check for Smooth Operation
Once the panels are in, it’s time to test the doors. The installer will slide and fold them multiple times to make sure the movement is smooth and the panels don’t stick or drag. If needed, adjustments are made to the hinges, rollers, and track.
This is also when the installer checks the locks, handles, and security features to ensure they work correctly.
Step 7: Seal and Weatherproof
To keep out wind, rain, and dust, the final step is to seal the edges of the frame. Installers use weatherstripping and caulk to fill any gaps around the door. This helps with both insulation and protection from the elements.
If your home is in a high-moisture or storm-prone area, you may want to consider extra sealing or impact-rated glass.
Step 8: Clean Up and Final Touches
With the doors in place, your installer will do a final clean-up, wiping down the glass and frames, removing debris, and making sure everything looks and works perfectly. You’ll also get a quick overview of how to care for your new bifold doors.
After Installation: How to Keep Them Looking New
Once installed, your bifold doors are easy to maintain. Just keep these quick tips in mind:
- Wipe down glass and frames regularly to remove dust and smudges.
- Keep the bottom track clear of dirt or small stones.
- Oil hinges and rollers once or twice a year.
- Check the seals every season, especially after heavy rain or storms.
With just a little care, your doors will continue to open beautifully for years.
FAQs About Installing External Bifold Doors
How long does installation take?
Most bifold door installations take one to two days, depending on the size and condition of the opening.
Can I install bifold doors in an older home?
Yes! As long as the structure can support the frame, bifold doors can be installed in both old and new homes.
Are bifold doors energy-efficient?
Modern bifold doors use insulated glass and tight seals to keep your home comfortable and lower energy costs.
Do I need a permit to install bifold doors?
Usually not, but it’s best to check local building codes if you’re changing the size of the opening or making structural changes.
What’s the best material for bifold doors?
Aluminum is sleek and weather-resistant, wood offers classic charm, and composite or vinyl frames are low-maintenance and great for most climates.